Thursday, November 20, 2014

Canadaigua Train Depot lives on

Canandaigua Train Depot
Canandaigua Train Depot Mural by Amy Colburn
When you're a kid, you never know what your friends are going to grow up to be.  Some become doctors, lawyers, get into politics, or become blue collar workers, for which I have the utmost respect. Some are crazy successful, some do well, and well, some never change and are just flat out crazy :)

A friend of mine from back in high school I would put in that first category.  I remember her being "artsy" back then, but now she is an amazingly successful artist and I'm blown away every time I see her work.  Sure you may think I'm bias because I know her, but take a look for yourself, you'll agree. I'd bet on it.

Obviously this is a model railroad blog, specifically my personal layout, so I'm partial to train things that relate to the empire I'm building in my basement.  I like looking at old photographs of trains, stations and run-down rail served industries in Canandaigua and the surrounding areas.  I wonder about times-gone-by and in the last few years have loved digging into the history of my own modeled railroad.  I remember reading about how this new railroad going through Canandaigua was a threat to the Erie Canal, the laws that governed its deliveries to town and what the townspeople did in reaction.   I used to think all that train history stuff was for really old train-guys.  Maybe it is, but I'm not really old (yet),  I find it fascinating, which brings me back to my friend.

What does history and pictures and model railroading have to do with my friend you may ask?

I reconnected with my friend when I stumbled across a model railroad layout mural she painted which is nothing short of stunning. 

Well, Amy Colburn is an amazingly talented illustrator. She was recently commissioned by some gracious donors to paint an outside mural of the Canandaigua Train Depo circa 1916.  Why does this excite me, other than being painted by someone I know?  Its the same depot that I have on my layout.

The original structure is situated at the intersection of Pleasant Street and Niagra, technically its address is 20 Pleasant Street  You can click the link and drop down to street view to see the "current" state of the building. I say "current" in quotes, because, well, its the state of the building when the Google car drove by :)  Its actually, as Amy mentions in her write up, now home to Beehive Brew Pub and Twisted Rail Brewing Co and I'm definitely visiting those next time I'm in that area, to see the old station of course ;-)

This mural is not only cool because it relates to what I'm doing, its cool because if you read her story, its increased awareness of the old landmark.  She mentions people coming by each day to talk, and ask questions.  Looking at the photos she's posted, and not being an artist, when I scrolled to the one of her first starting with a ruler up on scaffolding, I felt the overwhelming stress, pressure and nervousness she had to have felt.  Although maybe not, because she' good and I'm sure she had a plan.  I wouldn't know where to start. I just see a giant white building and a huge project ahead of me.

Looking at photos of the finished mural, its simply breathtaking. Her attention to detail is so realistic that I'm running out of adjectives to describe her work.  FWIW, I've typed and removed "amazing" at least 6 times already, and ya gotta give me credit for coming up with breathtaking, because it really is.  I imagine seeing the real thing will definitely be an experience.

I look forward to a time when I can sit down and talk to her in depth about this project, all the planning and hear the inside scoop of what it was truly like to do something that large, in the public eye all the time.  I'm also curious if the train kicked up debris that stuck to wet paint, just something I thought of when I saw the picture of it passing by.

If you haven't clicked a link above yet,  I definitely recommend you check out her blog and read up on her Canandaigua Train Depo mural I think you'll agree its, well, its amazing :)  I'm looking forward to visiting it, and quite possibly contacting Amy for a personal tour and photo op.

I'll say it one last time, what an amazing project both in scope, beauty and meaningfulness.  I'm proud to brag that I know her.


Recent Ballasting and scenery

Its been a while so I thought I'd post some pictures of some recent work.


Monday, April 7, 2014

Mountain and Tipple Progress


The Mountain range begins with Peter (my son) building out the shell using the cardboard weave method.  He really seemed to enjoy this.  I showed him what to do and he went at it (this pic is from 2012, talk about long time with no updates, Geesh).  He was always afraid to do anything because he thought it wouldn't be good enough.  He had no idea I loved having him there, well actually he does know, because I told him.  There wasn't anything he could do wrong, and once he realized that, I would get an occasional question "is this ok?"  It was cute, he really didn't want to screw up.


the next set of pictures jumps to having another wall of mountain covered with plaster cloth and painted
Had to get a tunnel in there. What's a layout without some hidden-hard-to-reach place for the train to derail!?


My dad built a coal tipple and gave it to me for Christmas, I placed it here multiple times to make sure it fits where it was supposed to.  You can also see I've laid track already so its placed perfectly where it needs to be.

I've painted the back mountain.  In the foreground, you can see a farm scene (also built by my dad) just sitting there, waiting to be "planted"

Right, so this was a mess.  I wanted a block / brick wall behind the tipple, and I didn't want to buy one, so I decided to make one.  It started out like a nightmare.  I tried to create a vertical form to pour plaster into, but that all oozed out all over.  Then I tried to make a flat horizontal form on the table, and figured I'd just pop out the solid "wall" of plaster and then carve it.  Yea, that didn't work either.  So with this failed attempt, I grabbed a putty knife, and just pressed it in place, like I was filling holes.  Once I had a giant glob flattened out, I started carving.  This took a couple hours to do, but was actually kind of fun.  You can see I alternated between block with a strip of large brick.

The thing I like about plaster is that it you can make it look damaged without much work, and honestly, happens whether you want it to or not.  The odd patterns here have to do with how hard the various areas were when I was applying my botched batch.  I think it looks old and banged up.
here's the wall with a base coat of grey.  I wiped off some some areas, and was just playing around, and learning the effects of wet paint on soft plaster.

I wanted the brick to be darker, and here's a pretty dark wash of india ink, alcohol, and paint.  I painted about 15 coats of various colors on this thing to get the look I wanted.  Not because the look required 15 coats, but because I don't know what I'm doing, so it took me 15 coats, and I'm not really there yet.  Closer, but its still not quite right.

Here's the wall almost done, I'll probably tone down the brick color, like I said above, its still not quite right

And here's the wall, you can see it over the car.  My dad did an awesome job weathering the tipple, look at that paint!

Next up - building some rock outcroppings and scenicing the mountain itself.  I'm pretty sure scenicing is a model railroader word, but spellcheck doesn't appreciate this term, its underlined in red with only "scenting" as a recommendation.


Tuesday, October 1, 2013

Latest Progress Pictures

Here are some updated photos of my progress, some vineyard pics and some scenery progress on the peninsula.

VINYARD PROGRESS


PENINSULA / DOWNTOWN


Wednesday, March 27, 2013

Main Street

Its been a while since I've posted, and not a whole lot has changed, life has been busy upstairs.  I make it down to Canandaigua once and a while and maybe get about 10 to 15 minutes of work here and there, so progress has been slow.

In this picture to the left, you can see some work has been done.  Firstly, I've added a sheet of white Styrofoam to give some elevation to the town.  In reality main street goes down-hill toward the lake, the foam is carved with a slight slope to represent the descent south toward the lake.  It hard to see here, but I do have 2 layers of foam in some places for more elevation character. 

The brown is my own custom mix for base ground.  Its drywall compound, brown latex paint and saw-dust, mixed to a semi-thick, yet spreadable goop.  I applied and spread it around with a putty knife.  Since the paint is mixed in, if you chip off a lump, or have to sand it down, it stays brown.

 Also here I've used normal off the shelf drywall compound for the road, again applied with a simple putty knife, its still wet in this photo.

Below are some pictures after sanding and the first staining with an india-ink / alcohol mix and a light patching with thin layers of compound. When this is dry I'll stain it all a few more times to get a nice dark weathred grey.  The new patches will be slightly lighter than the rest, adding to the aged, weathered look. That's the yellow Town Hall in the background of the first two pics, and the Canandaigua Hotel in the background of the third.

Since my tools were already dirty, I figured I'd keep laying road. Here is the road that goes by the station, along with a back alley way that opens to the station's parking lot


That's about all the progress right now, I'll post some pictures when the roads are complete

Sunday, October 28, 2012

The Vineyard

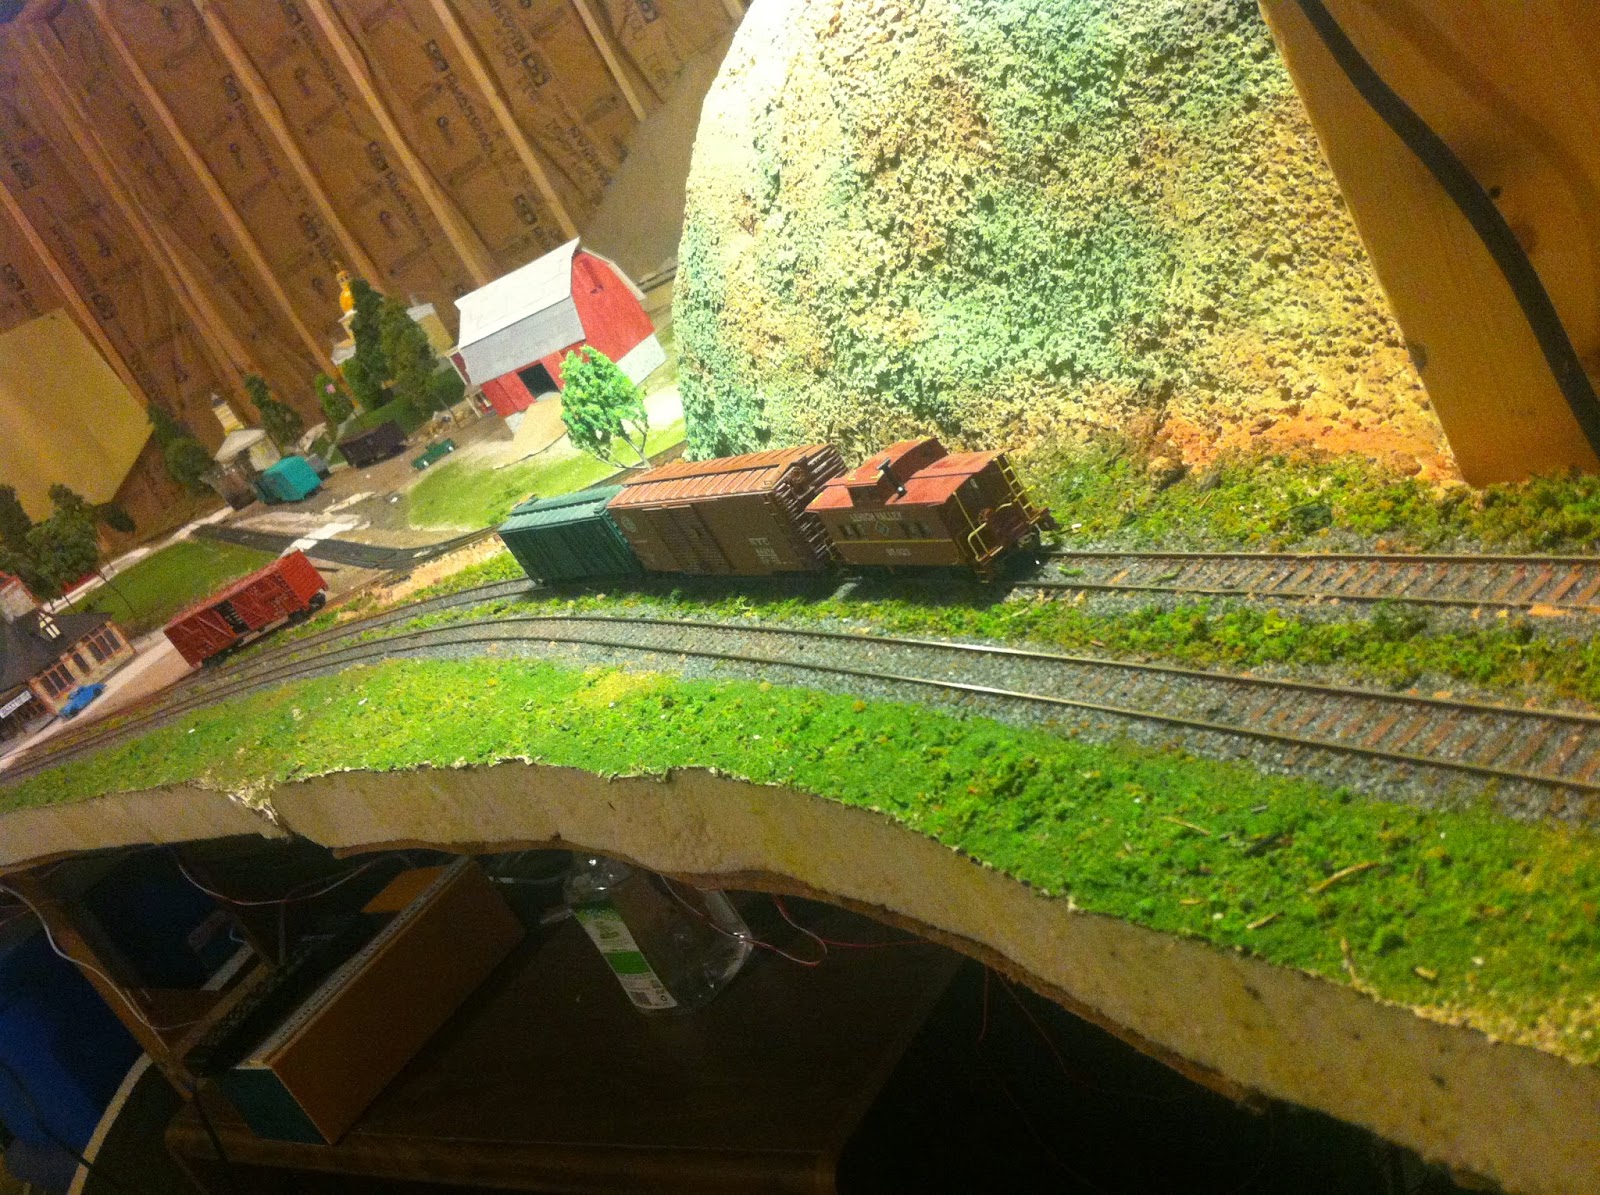
Since I'm building Canandaigua, and there isn't much interesting operation (model trainwise) you can get from the actual prototype, I've decided to focus on the winery industry.  Canandaigua does have a winery, and I thought with Naples down the road, grapes could be rolled in if needed, and/or I would build a vineyard somewhere on the layout to feed the winery, adding more operation options.

I looked around and found one place that sells a vineyard kit, however, that only covered a few square inches of land for around $30.  I figured to purchase enough of these kits to get a vineyard worth looking at would cost $100s.

This past friday an article in Model Railroad Hobbyist magzine had this AMAZING article  - you have to at least look at his pictures - How to plant an N-scale Vineyard.  It goes over a very inexpensive way to build a vineyard for N-scale. Near the bottom of his post, before the comments, he has a video that gote through the entire process from beginning to end.

I read through it, and watched the video, took notes, and thought up a plan.  In his article, M.C. uses stranded wire as the vines, twists, bends, coats them with a stucco paste, paints them, covers them with floss/fiber, sprays and foams them, and finally plants them.  That's all after he's put in all the posts, wire, static grass in between.  This is a lot of work, but you can't argue that its not worth it.  His results are nothing short of spectacular.

I model HO, so I couldn't follow this exactly.  I looked around at what I had and realized - I don't have stranded wire, don't have stucco paste, Mr. T pins, or the ez-line he uses.  So I'm back at square one, kind of, but not really because now I have something to go from.  That bug of an idea in my head that its possible to scratch build a vineyard.  Something I didn't thnk was possible for a new modler like me.  Seeing how he accomplished the final product was invaluable. So I started thinking how I could achieve something even close to what he did.

I was out mowing and the field next to me has weeds, shrubs, random types of trees and bushes.  I hear all the time in podcasts about people taking real branches, and twigs and using them to make realistic trees or using them somehow on their layout.  Looking at the mess that the neighboring empty lot is, a plan started to form in my head.

Since M.C. took the stranded wire, stripped it, twisted it, bent it into a T shape, added stucco paste, then painted it a dark grey - all to get them to look like real grape vines (and they do!).  I figured - since I don't have those supplies, nor really anything that coudl substitute for them, what if I "short-cutted" all of those steps that and used real wood for my vines?  I walked through the bushes shown in the picture and cut a large bouquet of weeds of various sorts, figuring something in this mess has to work.  When I went down to the basement to work that night, I looked through what I had cut.  I found that one of the weeds (have no idea what its called) looked like the perfect thickness for HO style vines.  Since its natural, it has slight bends, texture, color, and a look that will surve my purposes, AND saved me from that labor of love M.C. went through crafting his vines and trunks. My only hope at this point is that they look half as good as his do.

I went gathered all of this type of weed branch and pulled out 7 or 8 long pieces.  I ran my fingers down them to de-leaf them since I didn't need the 20' scale leaves :) The entire plant is approximately 3 feet long, and I was really interested in the 'branches' at the top.  The picture to the right shows the branches in tact, with (most of) the leaves removed.  Some little leafy pieces were left over and I figured they would add character to the vines when they were built.

I used some old athletic trainer scissors (they cut through pennies ... if you ever need to do that) to cut the branches off.  One thing I quickly noticed (which is pretty obvious if you think about it) is that the closer to the end of the branch you get, the smaller the diameter is.  At first I was worried that this would lead to a stupid looking vine, but after giving it more thought I realized that if I could use the thicker portions for the trunk and smaller for the vine arms, it might work.

I looked at my notes, and watched M.C. video again to make sure my notes were correct.  He said that the vines are approx 6 feet tall.   When he cut and bent his, he ended up with a side-to-side span of his T of about eight feet.  So I decided to cut my pieces (trunks and arms) to 8 scale feet.  This will give me the 8-foot span, and give me 2-scale feet to bury when they get planted.  I use the same cutting scissors to cut up my branches into a pile of 8-foot sections like the picture to the right.  After only 15 minutes I had all my pieces cut up and in a nice pile.  I just let the pieces pile together and didn't separate them based on their thickness.  I figured I'd do that as I assembled them.

I took my favorite modeling tool - Loctite Ultra Gel and built Ts out of these pieces.  I tried at first to choose thick pieces for the stem and smaller diameter pieces for the arms.  These will become the equivalent to M.C's wire pieces he painstakingly detailed.  The gel dries pretty fast, so by the time I was done with the second row, the first ones were dry.  If you look, these look pretty real (probably because they're natural).  Some are bent, some have bumps, and other character to them. So my first fear that mine might look like M.C.'s is gone, I think I accomplished that.  Having done this batch, I think they'll work fine, but I think on next batch, I may glue the arms to the top of the trunk, instead of in front - if that makes sense.  I think they'll may line up better that way.  for these, I'll find out shortly when I plant them but I'll probably alternate these facing forward, backward to give the line a little variety, we'll see, it might not be a problem and might end up working better than if they were assembled to the tops of the trunks.

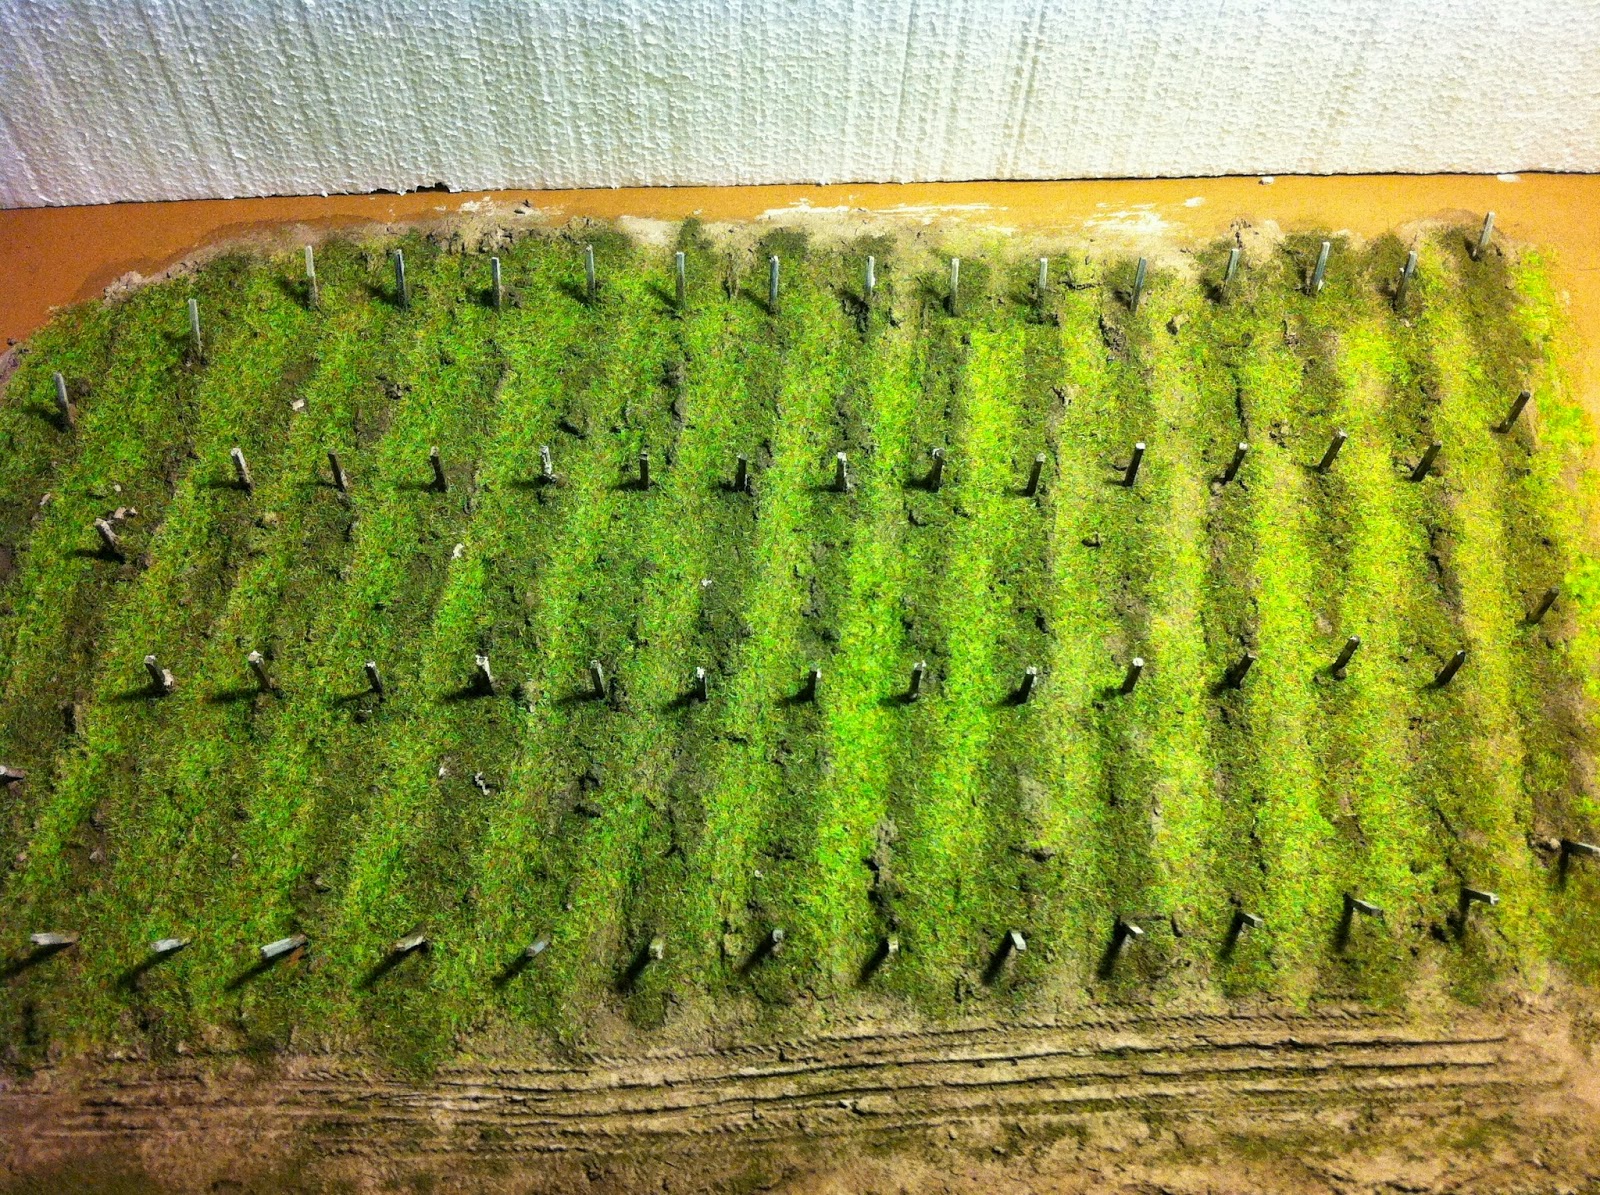
Now - I proved I could build the basic vine, but I had to figure out where to plant the vineyard.  I knew basically where I wanted one, but it wasn't prepped or anything.  Since I've decided to remove the upper track (you can see that in the top-left of the photo), I had more room for a vineyard.  I may sculpt a nice hill and add more on that plateau as well.  Anyway, I cleared out all the miscellaneous items from that area, and gave it a base coat of paint that I happened to have laying around. I grabbed an old country house I had just to get an idea of where I might place a structure and how much clearance to leave, etc.  Looking at my notes again, M.C. put his posts 24' apart and spaced the rows 10' from each other. I drew some lines and since I didn't have T-pins I grabbed some thumb tacks.  The green are the end posts, and yellow are the straight middle posts (Yea, I'm a little OCD like that)

I had some HO 4x4 balsa wood that I had played around with weathering quite some time ago, which looked perfect for the vineyard posts.  I cut those to 8' lengths as well figuring I'd bury 2' of it when I placed them. After I had a pile of posts, I dipped the ends in an india ink mix to turn the ends grey where I had cut them.

I then took a large finishing nail (my post hole digger), removed a thumb tack and shoved the nail in the hole at an angle.  Took a post, dabbed a small bit of wood glue and sank the post into the hole. It may be important to note that I have a 2" foam base.  The foam board I use was from the 'cull' section at a lumber yard (this was free!) and it has a thick fiberglass paper on both sides (grey above).  This paper is great for holding things in place and adhering items to, however, it does have fiberglass woven into it, so if you run your hand, forearm, etc along it, you'll end up with little dots of pain all over (experience).

The picture above, shows my post hole digger and a couple posts I placed already. My lines and bad ground paint job is apparent as well.  That's another thing about the paper backed foam board, it absorbes everything, so if I really wanted a nice constant coat, I'd have done a 3rd coat.  I actually had applied a 2nd coat on this when it was still wet.  I think the variation gives it a nice ground look, and really, its mostly going to be covered later anyway.  thinking about it, I guess I should have added that before my posts, I was just so excited to get going.  So live and learn, that's what the hobby is about when you're new like me.

Once a post was placed I measured to make sure it was 6' high to match the rest of the posts and vines to come. I worked my way around, pulling out the green tacks, digging the post hole with my nail and planting posts. Eventually I made it around the vineyard and placed all the end posts.


It went pretty quickly and I think its looking good. I need to cut more posts for the rest of the field.  Then I have to figure out what to use for the vine wire.

That's as far as I've gotten.  Not bad for a night's work.


Sunday, May 6, 2012

More courthouse scene details

I was able to carve out some time to work on the courthouse area.  In Canandaigua, the courthouse is located on Main Street, elevated on a hill overlooking the town, with Lady Liberty on top.  Another trade-mark item is located in the yard, 'the spot' where the people of Canandaigua re-enact the signing of the treaty of 1794.

This treaty was one of the first treaties the United States entered into.   The Canandaigua Treaty, also known as the Pickering Treaty, or the George Washington Covenant, was an agreement between the Haudenosaunee (Six Nations Iroquois Confederacy) and the United States of America.


Two copies of the treaty were drafted in Canandaigua, New York.  One copy is held in the collection of the Ontario County Historical Society in Canandaigua and the other is in the National Archives in Washington, D.C. The treaty bears the United States seal and George Washington's signature and is dated January 21, 1795.


I remember as a child watching a re-enactment of that signing, and that happend at this boulder in the front yard, its a very important place in Canandaigua and couldn't be overlooked.   While this scene is still under construction (no stairs [on their way], trees, accessories), you can get a feel for that area in town.  To the left is an actual photo of the courthouse and the historical boulder. Looks like some trees are in order next.


Due to 'selective compression' to get it all in one area of my layout, Main street is seen in front of both pictures.  However, on my layout, this ends up technically being Ontario Street - where the Canandaigua Station is located (to the right of the photo above).  While its not the prototypical footprint of the town and precise location and orientation of the buildings there, you get an instant feel for the main landmarks and realize it is indeed Canandaigua.